
Google Drive ဆိုတာကေတာ့ ေရပန္းစားတဲ့ Cloud Storage ေတြထဲမွ တစ္ခု အပါအဝင္ ျဖစ္ပါတယ္။ Google Drive ကို Windows, Mac အစရွိတဲ့ OS ေတြမွာ ခ်ိတ္ဆက္ၿပီး အသံုးျပဳႏိုင္သလို၊ Ubuntu OS သံုးစဲြသူေတြ အေနနဲ႔လည္း Ubuntu OS မွာ Google Drive ကို ခ်ိတ္ဆက္ အသံုးျပဳလိုတယ္ဆိုရင္ ေအာက္ေဖာ္ျပပါ နည္းလမ္းအတိုင္း ျပဳလုပ္ၿပီး ခ်ိတ္ဆက္ႏိုင္မွာ ျဖစ္ပါတယ္။
Google Drive ကို ခ်ိတ္ဆက္ အသံုးျပဳဖို႔အတြက္ Ubuntu OS ေပၚမွာ Google-Drive-Ocaml-fuse ဆိုတဲ့ client software ကို ထည့္သြင္းရပါမယ္။ Google-Drive-Ocamlfuse ကို ထည့္သြင္းဖို႔အတြက္ ပထမဆံုး Ubuntu OS System ရဲ႕ Package ေတြကို Update ေတြ Upgrade ေတြျပဳလုပ္ ထားသင့္ပါတယ္။ Package ေတြကို Update ျပဳလုပ္ဖို႔အတြက္ Ubuntu ရဲ႕ Terminal ကို Ctrl + Alt + T ကို အသံုးျပဳၿပီး ဖြင့္ရပါမယ္။ ၿပီးၿပီဆိုရင္ေတာ့ Terminal ထဲမွာ sudo apt-get update ဆိုတဲ့ Command နဲ႔ Package ေတြကို အရင္ Update ျပဳလုပ္ရမွာ ျဖစ္ပါတယ္။ Update ျပဳလုပ္ၿပီးၿပီ ဆိုရင္ေတာ့ sudo apt-get upgrade နဲ႔ Upgrade ထပ္မံ လုပ္ေပးရပါမယ္။
ေနာက္တစ္ဆင့္ကေတာ့ Google-Drive-Ocamlfuse ကို Install ျပဳလုပ္ဖို႔အတြက္ Terminal မွာ ေဖာ္ျပပါ Command ေတြကို တစ္ေၾကာင္းခ်င္းစီ ႐ိုက္ထည့္ေပးရမွာ ျဖစ္ပါတယ္။ အသံုးျပဳရမယ့္ Command ကေတာ့-
sudo add-apt-repository ppa:alessandro-strada/ppa
sudo apt-get update
sudo apt-get install google-drive-ocamlfuse
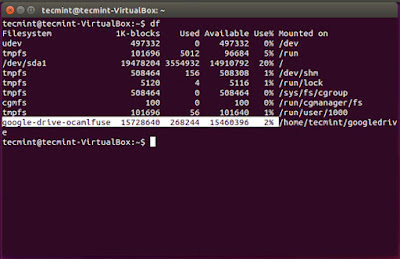
ဆိုတဲ့ command ျဖစ္ပါတယ္။ အဆိုပါ command ကို ထည့္သြင္းၿပီးၿပီဆိုရင္ Google-Drive-Ocamlfule နဲ႔ ပတ္သက္တဲ့ Package ဖိုင္ေတြကို download ျပဳလုပ္မွာ ျဖစ္တဲ့အတြက္ ခဏေစာင့္ေပးရပါမယ္။ Download ျပဳလုပ္ၿပီးသြားၿပီဆိုရင္ အဆိုပါ ဖိုင္ေတြကို တစ္ခါတည္း ထည့္သြင္းေပးသြား ပါလိမ့္မယ္။ အသံုးျပဳဖို႔ အတြက္ကေတာ့ Terminal မွာ google-drive ocamlfule ဆိုတဲ့ command ကို ႐ိုက္ထည့္ေပးၿပီး Google Drive ကိုအသံုးျပဳတဲ့ account နဲ႔ password ကို ထည့္သြင္းေပးလိုက္ရင္ စတင္အသံုးျပဳႏိုင္ၿပီ ျဖစ္ပါတယ္။
Google Drive ကို ခ်ိတ္ဆက္ အသံုးျပဳဖို႔အတြက္ Ubuntu OS ေပၚမွာ Google-Drive-Ocaml-fuse ဆိုတဲ့ client software ကို ထည့္သြင္းရပါမယ္။ Google-Drive-Ocamlfuse ကို ထည့္သြင္းဖို႔အတြက္ ပထမဆံုး Ubuntu OS System ရဲ႕ Package ေတြကို Update ေတြ Upgrade ေတြျပဳလုပ္ ထားသင့္ပါတယ္။ Package ေတြကို Update ျပဳလုပ္ဖို႔အတြက္ Ubuntu ရဲ႕ Terminal ကို Ctrl + Alt + T ကို အသံုးျပဳၿပီး ဖြင့္ရပါမယ္။ ၿပီးၿပီဆိုရင္ေတာ့ Terminal ထဲမွာ sudo apt-get update ဆိုတဲ့ Command နဲ႔ Package ေတြကို အရင္ Update ျပဳလုပ္ရမွာ ျဖစ္ပါတယ္။ Update ျပဳလုပ္ၿပီးၿပီ ဆိုရင္ေတာ့ sudo apt-get upgrade နဲ႔ Upgrade ထပ္မံ လုပ္ေပးရပါမယ္။
ေနာက္တစ္ဆင့္ကေတာ့ Google-Drive-Ocamlfuse ကို Install ျပဳလုပ္ဖို႔အတြက္ Terminal မွာ ေဖာ္ျပပါ Command ေတြကို တစ္ေၾကာင္းခ်င္းစီ ႐ိုက္ထည့္ေပးရမွာ ျဖစ္ပါတယ္။ အသံုးျပဳရမယ့္ Command ကေတာ့-
sudo add-apt-repository ppa:alessandro-strada/ppa
sudo apt-get update
sudo apt-get install google-drive-ocamlfuse
ဆိုတဲ့ command ျဖစ္ပါတယ္။ အဆိုပါ command ကို ထည့္သြင္းၿပီးၿပီဆိုရင္ Google-Drive-Ocamlfule နဲ႔ ပတ္သက္တဲ့ Package ဖိုင္ေတြကို download ျပဳလုပ္မွာ ျဖစ္တဲ့အတြက္ ခဏေစာင့္ေပးရပါမယ္။ Download ျပဳလုပ္ၿပီးသြားၿပီဆိုရင္ အဆိုပါ ဖိုင္ေတြကို တစ္ခါတည္း ထည့္သြင္းေပးသြား ပါလိမ့္မယ္။ အသံုးျပဳဖို႔ အတြက္ကေတာ့ Terminal မွာ google-drive ocamlfule ဆိုတဲ့ command ကို ႐ိုက္ထည့္ေပးၿပီး Google Drive ကိုအသံုးျပဳတဲ့ account နဲ႔ password ကို ထည့္သြင္းေပးလိုက္ရင္ စတင္အသံုးျပဳႏိုင္ၿပီ ျဖစ္ပါတယ္။
Credit - Internet Journal
Post a Comment